
Quarkus (https://quarkus.io/) – A Supersonic Subatomic Java has recently been announced from some Red Hat Developers. The idea is to build a Java runtime that is native to Kubernetes and small and fast so it can also used in serverless scenarios or on very small edge devices.
With Quarkus it is possible to create a “native” build that produces a small self-contained binary that can run in any container image.
The goal of this blog post is to provide a simple hands-on lab for Openshift to get started with Quarkus and to do something useful.
I must admit that I shamelessly build upon work done by my great colleagues, namely from Karsten Gresch from this post https://medium.com/@gresch/quarkus-native-builds-with-openshift-s2i-9474ed4386a1
The source code and the application code I got from http://www.mastertheboss.com/soa-cloud/quarkus/getting-started-with-quarkus
Ok, lets get our hands dirty with it!
Importing the source code
I put the code in my github repository “quarkus-demo”: https://github.com/iboernig/quarkus-demo
If you are working with the Eclipse Che based cloud native workshop, make sure you are in the /projects/labs/ directory:
$ cd /projects/labs
Then clone the git repository:
$ git clone https://github.com/iboernig/quarkus-demo.git
The quarkus-demo directory should now show up in the project explorer on the left.
Here you can left-click on that repository and convert to a maven project (same as for the other projects). This is not a necessary step, since we will not use the local maven but will use OpenShift s2i to build and deploy the application.
Examining the source code
In the src/main/java/org.acme.quickstart directory we at first the simple REST Endpoint example. It contains the class GreetingResource.java:
package org.acme.quickstart;


import javax.inject.Inject;
import javax.ws.rs.GET;
import javax.ws.rs.Path;
import javax.ws.rs.PathParam;
import javax.ws.rs.Produces;
import javax.ws.rs.core.MediaType;

@Path("/hello")
public class GreetingResource {

    @Inject
    GreetingService service;

    @GET
    @Produces(MediaType.TEXT_PLAIN)
    @Path("/greeting/{name}")
    public String greeting(@PathParam("name") String name) {
        return service.greeting(name);
    }

    @GET
    @Produces(MediaType.TEXT_PLAIN)
    public String hello() {
        return "hello";
    }
}
and the simple GreetingService.java:
package org.acme.quickstart;

import javax.enterprise.context.ApplicationScoped;

@ApplicationScoped
public class GreetingService {

   public String greeting(String name) {
      return "hello " + name;
   }
}
This will produce a simple “hello” output on the /hello URL and a short greeting with a name on /hello/greeting/<name> .
Something useful
But now we look at a little more interesting example. Lets do a simple user registration. Something that is missing in our Coolstuff store.
Lets start with the Class Person.java:
package com.sample;

import java.util.Objects;

public class Person {

    String name;
    String surname;

    public Person( ) {  }

    public String getName() {
        return name;
    }
    public String getSurname() {  return surname;  }
    public void setName(String name) {
        this.name = name;
    }
    public void setSurname(String surname) {
        this.surname = surname;
    }
    @Override
    public String toString() {
        return "Person{" +
                "name='" + name + '\'' +
                ", surname='" + surname + '\'' +
                '}';
    }

    @Override
    public boolean equals(Object o) {
        if (this == o) return true;
        if (o == null || getClass() != o.getClass()) return false;
        Person person = (Person) o;
        return Objects.equals(name, person.name) &&
                Objects.equals(surname, person.surname);
    }

    @Override
    public int hashCode() {
        return Objects.hash(name, surname);
    }
}
And an endpoint to safe this into a collection. RESTEndpoint.java:
package com.sample;

import java.util.Collections;
import java.util.LinkedHashMap;
import java.util.Set;

import javax.ws.rs.Consumes;
import javax.ws.rs.DELETE;
import javax.ws.rs.GET;
import javax.ws.rs.POST;
import javax.ws.rs.Path;
import javax.ws.rs.Produces;
import javax.ws.rs.core.MediaType;

@Path("/persons")
@Produces(MediaType.APPLICATION_JSON)
@Consumes(MediaType.APPLICATION_JSON)
public class RESTEndpoint {

    private Set<Person> persons = Collections.newSetFromMap(Collections.synchronizedMap(new LinkedHashMap<>()));

    @GET
    public Set<Person> list() {
        return persons;
    }

    @POST
    public Set<Person> add(Person person) {
        System.out.println("Saving: " +person);
        persons.add(person);
        return persons;
    }

}
Note: The files are already in the repository. This is just for a review.
Adding an UI
Adding HTML UI is also quite easy with quarkus. Lets turn to the src/main/resources/META-INF/resources/ directory. Here you can find the following HTML code (with AngularJS for displaying the data) in the index.html:
 <!doctype html>
<html>
<head>
    <meta charset="utf-8"/>
    <title>Quarkus REST service</title>
    <link rel="stylesheet" href="https://cdnjs.cloudflare.com/ajax/libs/wingcss/0.1.8/wing.min.css"/>
    <!-- Load AngularJS -->
    <script src="//ajax.googleapis.com/ajax/libs/angularjs/1.4.8/angular.min.js"></script>
    <script type="text/javascript">
      var app = angular.module("PersonManagement", []);

      //Controller Part
      app.controller("PersonManagementController", function ($scope, $http) {

        //Initialize page with empty data
        $scope.persons = [];

        $scope.form = {
          name: "",
          surname: ""
        };

        //Now load the data from server
        _refreshPageData();

        //HTTP POST methods for add data
        $scope.add = function () {
          var data = { "name": $scope.form.name, "surname": $scope.form.surname };

          $http({
            method: "POST",
            url: '/persons',
            data: angular.toJson(data),
            headers: {
              'Content-Type': 'application/json'
            }
          }).then(_success, _error);
        };


        //HTTP GET- get all persons collection
        function _refreshPageData() {
          $http({
            method: 'GET',
            url: '/persons'
          }).then(function successCallback(response) {
            $scope.persons = response.data;
          }, function errorCallback(response) {
            console.log(response.statusText);
          });
        }

        function _success(response) {
          _refreshPageData();
          _clearForm();
        }

        function _error(response) {
          alert(response.data.message || response.statusText);
        }

        //Clear the form
        function _clearForm() {
          $scope.form.name = "";
          $scope.form.surname = "";
        }
      });
    </script>
</head>
<body ng-app="PersonManagement" ng-controller="PersonManagementController">

<div class="container">
    <h1>Quarkus REST Service</h1>

    <form ng-submit="add()">
        <div class="row">
            <div class="col-6"><input type="text" placeholder="Name" ng-model="form.name" size="60"/></div>
        </div>
        <div class="row">
            <div class="col-6"><input type="text" placeholder="Surname" ng-model="form.surname" size="60"/></div>
        </div>
        <input type="submit" value="Save"/>
    </form>

    <h3>Person List</h3>
    <div class="row">
        <div class="col-4">Name</div>
        <div class="col-8">Surname</div>
    </div>
    <div class="row" ng-repeat="person in persons">
        <div class="col-4">{{ person.name }}</div>
        <div class="col-8">{{ person.surname }}</div>
    </div>
</div>

</body>
</html>
Now its time to get it running!
Let OpenShift do its work!
First of all, make sure that you are still logged in with the right user into OpenShift:
$ oc whoami
user1
Now check that you are in the right project
$ oc project
coolstore-01
(If you trying this outside the cloud native workshop, simple make sure that you have a project and are logged in into OpenShift).
The Quarkus S2i (Source-to-image) builder image is not yet a part of OpenShift by default, but it is available as a builder image on quay.io and needs to be called directly:
$ oc new-app quay.io/quarkus/centos-quarkus-native-s2i~https://github.com/iboernig/quarkus-demo.git --name=quarkdemo
Now OpenShift starts a build process and you can follow the progress here:
$ oc logs -f bc/quarkdemo
This is progressing quite slow and in the normal workshop scenario it finally stops and fails. Can you tell why?
Compiling to native needs a lot of resources and each project has limits. Either increase the limit yourself (if you are a cluster-admin) or talk to you instructor. He can help with increasing or removing the limit.
Ok, lets go for the next try. Restart the build:
$ oc start-build bc/quarkdemo
Now it progresses much faster and the ready built image is pushed to the local registry.
look for the upcoming pods:
$ oc get pods
NAME                READY     STATUS      RESTARTS   AGE
quarkdemo-1-626xd   1/1       Running     0          2s
quarkdemo-1-build   0/1       OOMKilled   0          5m
quarkdemo-2-build   0/1       Completed   0          5s
Its running! And you also can see, why the first build failed!
Now expose the service and get a route:
$ oc expose svc quarkdemo
route.route.openshift.io/quarkdemo exposed
$ oc get routes
NAME        HOST/PORT                                                   PATH      SERVICES    PORT       TERMINATION   WILDCARD
quarkdemo   quarkdemo-<project>-<serverurl>   quarkdemo  8080-tcp                 None
Now you can look at the URL in your browser:
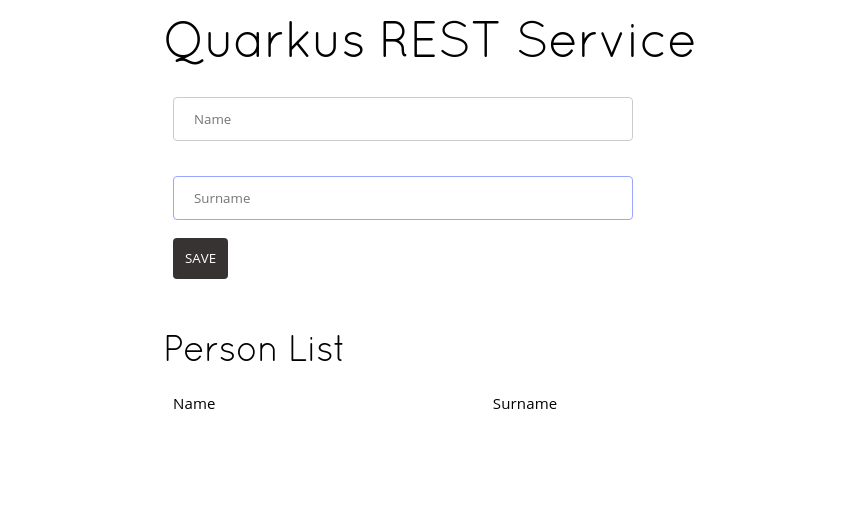
You can add names ad see what happens!
Also the simple rest service works with this binary:
$ curl http://<route>/hello
hello
$ curl http://<route>/hello/greeting/ingo
hello ingo
Very nice. But what makes Quarkus so special?
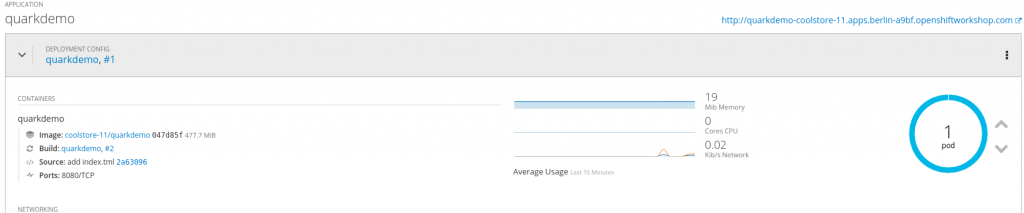
Its very small. Only 19 MB. And it doesn’t use a JVM to run: its just a simple binary:
$ oc get pods
NAME                READY     STATUS      RESTARTS   AGE
quarkdemo-1-626xd   1/1       Running     0          2h
quarkdemo-1-build   0/1       OOMKilled   0          3h
quarkdemo-2-build   0/1       Completed   0          2h
$ oc rsh quarkdemo-1-626xd
sh-4.2$ ls -lh
total 22M
-rwxr-xr-x. 1 quarkus    root 22M Apr  8 14:38 quarkus-quickstart-1.0-SNAPSHOT-runner
-rw-r--r--. 1 1000660000 root 337 Apr  8 14:39 quarkus.log
All in one 22 MB binary. Also impressive:
sh-4.2$ cat quarkus.log
2019-04-08 14:39:02,410 quarkdemo-1-626xd quarkus-quickstart-1.0-SNAPSHOT-runner[7] INFO  [io.quarkus] (main) Quarkus 0.12.0 started in 0.009s. Listening on: http://[::]:8080
2019-04-08 14:39:02,410 quarkdemo-1-626xd quarkus-quickstart-1.0-SNAPSHOT-runner[7] INFO  [io.quarkus] (main) Installed features: [cdi, resteasy, resteasy-jsonb]
That’s a startup time in the ms range! So it makes difference! Hope you enjoyed that lab!